Introduction to Glazed Gluten-Free Donut Holes
Glazed gluten-free donut holes are a delightful treat that everyone can enjoy. Whether you follow a gluten-free diet or simply want to try something new, these little bites of joy are perfect for any occasion. They are soft, sweet, and covered in a delicious glaze that makes them irresistible. Plus, they are easy to make at home!
What Makes Glazed Gluten-Free Donut Holes Special?
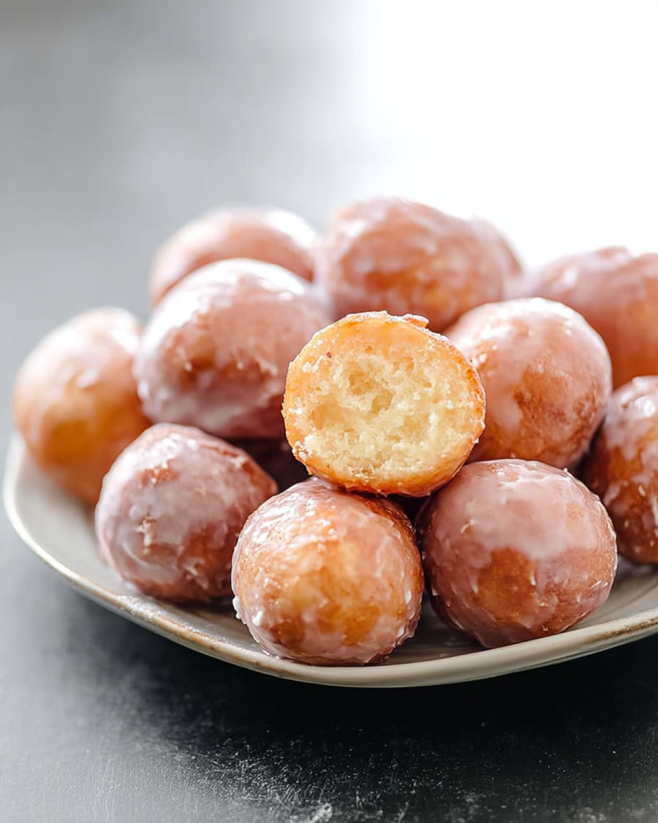
What sets glazed gluten-free donut holes apart is their unique texture and flavor. Made with gluten-free flour, they offer a light and fluffy consistency that rivals traditional donut holes. The combination of spices like cinnamon and nutmeg adds warmth and depth to each bite. The glaze, made from powdered sugar and milk, gives them a sweet finish that is simply delightful.
Moreover, these donut holes are versatile. You can customize them with different flavors or toppings to suit your taste. Whether you prefer a classic vanilla glaze or a rich chocolate coating, the options are endless. This makes them a fun treat for parties, brunches, or even a cozy afternoon snack.
The Rise of Gluten-Free Baking
In recent years, gluten-free baking has gained immense popularity. Many people are choosing gluten-free diets for various reasons, including health concerns and dietary restrictions. As a result, more recipes are being developed to cater to this growing demand. Gluten-free baking allows everyone to enjoy delicious treats without compromising their health.
Glazed gluten-free donut holes are a perfect example of this trend. They show that you can enjoy sweet treats without gluten while still maintaining great taste and texture. With the right ingredients and techniques, anyone can create mouthwatering gluten-free desserts that everyone will love.
Ingredients for Glazed Gluten-Free Donut Holes
To create your own batch of glazed gluten-free donut holes, you’ll need a few simple ingredients. Each component plays a vital role in achieving that perfect texture and flavor. Here’s what you’ll need:
- 1 cup gluten-free all-purpose flour: This is the base of your donut holes. Make sure to choose a high-quality blend for the best results.
- 1/2 cup granulated sugar: This adds sweetness and helps create a lovely golden color when baked.
- 1/2 teaspoon baking powder: This ingredient helps the donut holes rise, giving them a light and fluffy texture.
- 1/4 teaspoon baking soda: It works alongside the baking powder to ensure your donut holes are perfectly airy.
- 1/4 teaspoon salt: A pinch of salt enhances the overall flavor of the donut holes.
- 1/2 teaspoon ground cinnamon: This spice adds warmth and a hint of sweetness, making your donut holes even more delicious.
- 1/4 teaspoon nutmeg: Nutmeg complements the cinnamon and adds a unique flavor profile.
- 1/2 cup buttermilk: Buttermilk keeps the donut holes moist and tender. If you don’t have buttermilk, you can make a substitute by mixing milk with a splash of vinegar.
- 1 large egg: The egg binds the ingredients together and adds richness.
- 2 tablespoons melted butter: This adds flavor and moisture to the donut holes.
- 1 teaspoon vanilla extract: Vanilla enhances the sweetness and aroma of your donut holes.
For the glaze, you will need:
- 1 cup powdered sugar: This is the main ingredient for the glaze, providing sweetness and a smooth texture.
- 2 tablespoons milk: Milk helps to thin out the powdered sugar, creating a pourable glaze.
- 1/2 teaspoon vanilla extract: Just like in the donut holes, vanilla adds a lovely flavor to the glaze.
With these ingredients on hand, you’re ready to start making your glazed gluten-free donut holes. Each ingredient contributes to the overall taste and texture, ensuring a delightful treat for everyone!
Step-by-Step Preparation of Glazed Gluten-Free Donut Holes
Now that you have all your ingredients ready, it’s time to dive into the fun part: making your glazed gluten-free donut holes! Follow these simple steps to create a batch of delicious treats that everyone will love.
Step 1: Prepping Your Kitchen and Ingredients
Before you start baking, it’s important to prepare your kitchen. First, gather all your ingredients and tools. You’ll need a mixing bowl, a whisk, a mini muffin pan, and a wire rack. Preheat your oven to 350°F (175°C) and lightly grease your mini muffin pan. This will help your donut holes come out easily after baking.
Step 2: Mixing the Dry Ingredients
In a large mixing bowl, combine the dry ingredients. Start by adding the gluten-free all-purpose flour, granulated sugar, baking powder, baking soda, salt, ground cinnamon, and nutmeg. Use a whisk to mix everything together until it’s well combined. This step is crucial as it ensures that the leavening agents are evenly distributed, which helps your donut holes rise perfectly.
Step 3: Combining Wet Ingredients
In another bowl, mix the wet ingredients. Pour in the buttermilk, crack in the large egg, add the melted butter, and include the vanilla extract. Whisk these ingredients together until the mixture is smooth and creamy. This will create a rich base for your donut holes.
Step 4: Forming the Donut Holes
Now it’s time to combine the wet and dry ingredients. Pour the wet mixture into the bowl with the dry ingredients. Gently stir until just combined. Be careful not to overmix, as this can make your donut holes tough. Once the batter is ready, spoon it into the prepared mini muffin pan, filling each cup about 3/4 full. This allows room for the donut holes to rise while baking.
Step 5: Baking the Donut Holes
Place the muffin pan in the preheated oven and bake for 10-12 minutes. Keep an eye on them! You’ll know they’re done when the tops are golden brown and a toothpick inserted into the center comes out clean. Once baked, remove the pan from the oven and let the donut holes cool in the pan for about 5 minutes.
Step 6: Preparing the Glaze
While the donut holes are cooling, it’s time to prepare the glaze. In a small bowl, whisk together the powdered sugar, milk, and vanilla extract until the mixture is smooth and free of lumps. The glaze should be pourable but not too runny. If it’s too thick, add a little more milk until you reach the desired consistency.
Step 7: Glazing the Donut Holes
Once the donut holes have cooled completely, it’s time to glaze them. Dip the tops of each donut hole into the glaze, allowing any excess to drip off. Place them on a wire rack to let the glaze set. This will create a beautiful, shiny finish that makes your glazed gluten-free donut holes even more tempting!
And there you have it! Follow these steps, and you’ll have a delightful batch of glazed gluten-free donut holes ready to enjoy.
Variations of Glazed Gluten-Free Donut Holes
While the classic glazed gluten-free donut holes are delicious on their own, there are many fun variations you can try. These variations allow you to customize your donut holes to suit your taste or to impress your friends and family. Let’s explore some exciting flavor variations and topping options!
Flavor Variations
Adding different flavors to your donut holes can elevate them to a whole new level. Here are some ideas to get you started:
- Chocolate Donut Holes: For a rich chocolate flavor, simply add 1/4 cup of cocoa powder to the dry ingredients. This will give your donut holes a deep, chocolatey taste that pairs perfectly with a chocolate glaze.
- Maple Donut Holes: Replace the vanilla extract with maple extract in the batter. This will give your donut holes a warm, sweet maple flavor that’s perfect for breakfast.
- Orange Zest Donut Holes: Add a pinch of orange zest to the batter for a refreshing citrus twist. The bright flavor of orange complements the spices beautifully.
- Almond Donut Holes: Substitute almond extract for vanilla extract. This will add a lovely nutty flavor that pairs well with the sweetness of the glaze.
Feel free to mix and match these flavors to create your own unique combinations. The possibilities are endless!
Topping Options
In addition to flavor variations, you can also experiment with different toppings for your glazed gluten-free donut holes. Here are some tasty ideas:
- Sprinkles: After glazing, add colorful sprinkles on top for a fun and festive touch. This is especially great for parties or celebrations.
- Coconut Flakes: Sprinkle shredded coconut on top of the glaze for a tropical twist. Toasted coconut adds an extra layer of flavor.
- Chopped Nuts: Add chopped walnuts or pecans for a crunchy texture. The nuts will provide a nice contrast to the soft donut holes.
- Cinnamon Sugar: Before glazing, roll the warm donut holes in a mixture of cinnamon and sugar for a sweet, crunchy coating.
These topping options can make your glazed gluten-free donut holes even more delightful. Try different combinations to find your favorite!
Cooking Note for Glazed Gluten-Free Donut Holes
When it comes to baking glazed gluten-free donut holes, a few cooking notes can help ensure your treats turn out perfectly every time. Here are some essential tips to keep in mind:
- Choose the Right Flour: Not all gluten-free flours are created equal. Look for a blend that includes xanthan gum or guar gum, as these ingredients help mimic the elasticity of gluten. This will give your donut holes a better texture.
- Measure Accurately: Baking is a science, so measuring your ingredients accurately is crucial. Use a kitchen scale for the best results, especially for the flour. Too much flour can lead to dense donut holes.
- Don’t Overmix: When combining the wet and dry ingredients, mix until just combined. Overmixing can lead to tough donut holes. A few lumps in the batter are perfectly fine!
- Check for Doneness: Ovens can vary in temperature. To ensure your donut holes are baked perfectly, use a toothpick to check for doneness. If it comes out clean, they’re ready!
- Cool Before Glazing: Allow your donut holes to cool completely before dipping them in glaze. This prevents the glaze from melting and ensures a beautiful finish.
- Experiment with Glaze Consistency: If you prefer a thicker glaze, reduce the amount of milk. For a thinner glaze, add a bit more milk. Adjusting the consistency can change the overall look and taste of your donut holes.
By following these cooking notes, you’ll be well on your way to creating delicious glazed gluten-free donut holes that everyone will love. Happy baking!
Serving Suggestions for Glazed Gluten-Free Donut Holes
Once your glazed gluten-free donut holes are ready, it’s time to think about how to serve them. These delightful treats can be enjoyed in various ways, making them perfect for any occasion. Here are some serving suggestions to enhance your donut hole experience:
- Breakfast Treat: Serve the donut holes alongside a warm cup of coffee or tea for a delightful breakfast. They pair wonderfully with a light fruit salad or yogurt for a balanced meal.
- Snack Time: Pack a few donut holes in a lunchbox for a sweet afternoon snack. They are easy to grab and enjoy on the go, making them a great option for kids and adults alike.
- Party Platter: Arrange the glazed donut holes on a decorative platter for a fun dessert table at parties or gatherings. You can even create a donut hole tower for a stunning centerpiece!
- Brunch Delight: Include these donut holes in a brunch spread. They complement savory dishes like quiches or breakfast casseroles beautifully.
- Gift Idea: Package the donut holes in a cute box or jar and give them as a thoughtful gift. They make a sweet surprise for friends or family, especially those who follow a gluten-free diet.
With these serving suggestions, your glazed gluten-free donut holes will shine at any event. Enjoy sharing them with loved ones or savoring them all by yourself!
Tips for Perfect Glazed Gluten-Free Donut Holes
Creating the perfect glazed gluten-free donut holes is all about attention to detail. Here are some helpful tips to ensure your donut holes turn out delicious every time:
- Use Fresh Ingredients: Always check the expiration dates on your baking powder and baking soda. Fresh leavening agents are key to achieving that light and fluffy texture.
- Room Temperature Ingredients: For the best results, use room temperature ingredients. This helps them mix together more easily and creates a smoother batter.
- Don’t Skip the Glaze: The glaze is what makes these donut holes special! Make sure to dip them while they are still slightly warm for better adhesion.
- Experiment with Flavors: Don’t hesitate to try different spices or extracts. A little creativity can lead to exciting new flavors that everyone will love.
- Store Properly: If you have leftovers, store them in an airtight container at room temperature. This keeps them fresh and tasty for a few days.
- Share the Joy: Baking is more fun when shared! Invite friends or family to join you in making these delightful treats.
By following these tips, you’ll be well on your way to mastering the art of making glazed gluten-free donut holes. Enjoy the process and the delicious results!
Breakdown of Time for Glazed Gluten-Free Donut Holes
Understanding the time required to make glazed gluten-free donut holes can help you plan your baking session better. Here’s a simple breakdown of the time involved in each step of the process:
Prep Time
The prep time for glazed gluten-free donut holes is approximately 15-20 minutes. This includes gathering your ingredients, measuring them out, and mixing the wet and dry components. Taking your time during this stage ensures that everything is ready for a smooth baking experience.
Cooking Time
Once your batter is ready, the cooking time is about 10-12 minutes. During this time, the donut holes will rise and turn golden brown in the oven. Keep an eye on them to ensure they don’t overbake. A toothpick test will help you determine when they are perfectly done!
Total Time
In total, you can expect to spend around 30-35 minutes from start to finish. This includes prep time, cooking time, and a brief cooling period before glazing. With this quick and easy timeline, you can whip up a batch of delicious glazed gluten-free donut holes in no time!
Nutritional Information for Glazed Gluten-Free Donut Holes
Understanding the nutritional content of your glazed gluten-free donut holes can help you enjoy them as part of a balanced diet. Here’s a breakdown of the key nutritional components for each donut hole:
Calories
Each glazed gluten-free donut hole contains approximately 90 calories. This makes them a delightful treat that can fit into your daily caloric intake without too much guilt. Enjoying one or two as a snack or dessert can satisfy your sweet tooth while keeping your calorie count in check.
Protein
These donut holes provide about 1 gram of protein per piece. While they are not a significant source of protein, they can still contribute to your overall daily intake when paired with other protein-rich foods. Consider enjoying them with a glass of milk or a yogurt for a more balanced snack.
Sodium
Each donut hole contains roughly 50 milligrams of sodium. This is a relatively low amount, making them a suitable option for those watching their sodium intake. However, it’s always good to be mindful of your overall sodium consumption throughout the day.
In summary, glazed gluten-free donut holes are a tasty treat that can be enjoyed in moderation. With their reasonable calorie count and low sodium content, they can be a delightful addition to your dessert repertoire. Just remember to balance them with other nutritious foods for a well-rounded diet!
FAQs about Glazed Gluten-Free Donut Holes
Can I use regular flour instead of gluten-free flour?
Using regular flour instead of gluten-free flour is not recommended for this recipe. Gluten-free flour blends are specially formulated to mimic the texture and rise of traditional flour. If you use regular flour, the donut holes may not turn out as intended. However, if you do not need a gluten-free option, feel free to substitute with all-purpose flour for a classic version!
How do I store glazed gluten-free donut holes?
To keep your glazed gluten-free donut holes fresh, store them in an airtight container at room temperature. This will help maintain their softness and flavor. They are best enjoyed within a few days, but can last up to a week. If you notice any signs of staleness, you can warm them slightly in the microwave for a few seconds to revive their texture.
Can I freeze glazed gluten-free donut holes?
Yes, you can freeze glazed gluten-free donut holes! To do this, place them in a single layer on a baking sheet and freeze until solid. Once frozen, transfer them to an airtight container or freezer bag. They can be stored in the freezer for up to three months. When you’re ready to enjoy them, simply thaw at room temperature or warm them in the microwave for a few seconds.
What are some common mistakes to avoid when making glazed gluten-free donut holes?
A few common mistakes can affect the outcome of your glazed gluten-free donut holes. Here are some to watch out for:
- Overmixing the Batter: Mixing too much can lead to tough donut holes. Stir until just combined for the best texture.
- Not Measuring Ingredients Accurately: Baking is a science! Use measuring cups and spoons for precise amounts.
- Skipping the Cooling Step: Glazing warm donut holes can cause the glaze to melt. Allow them to cool completely before dipping.
- Using the Wrong Flour: Not all gluten-free flours work the same. Choose a blend that includes xanthan gum for the best results.
By avoiding these common pitfalls, you’ll be on your way to making perfect glazed gluten-free donut holes every time!
Conclusion on Glazed Gluten-Free Donut Holes
In conclusion, glazed gluten-free donut holes are a delightful treat that everyone can enjoy, regardless of dietary restrictions. Their soft, fluffy texture and sweet glaze make them a perfect snack or dessert for any occasion. With simple ingredients and easy preparation steps, you can whip up a batch in no time!
These donut holes not only satisfy your sweet tooth but also offer a chance to explore various flavors and toppings. Whether you prefer classic vanilla, rich chocolate, or a zesty citrus twist, the possibilities are endless. Plus, with the tips and variations provided, you can customize your donut holes to suit your taste and impress your friends and family.
As gluten-free baking continues to rise in popularity, recipes like these show that you don’t have to sacrifice flavor or texture. With the right ingredients and techniques, you can create delicious treats that everyone will love. So, gather your ingredients, follow the steps, and enjoy the process of making these delightful glazed gluten-free donut holes!
Happy baking, and may your kitchen be filled with the sweet aroma of freshly baked donut holes!
Glazed Gluten-Free Donut Holes
Ingredients
Equipment
Method
- Preheat your oven to 350°F (175°C) and lightly grease your mini muffin pan.
- In a large mixing bowl, combine the dry ingredients: gluten-free flour, sugar, baking powder, baking soda, salt, cinnamon, and nutmeg.
- In another bowl, mix the wet ingredients: buttermilk, egg, melted butter, and vanilla extract until smooth.
- Pour the wet mixture into the dry ingredients and stir until just combined. Spoon the batter into the prepared mini muffin pan, filling each cup about 3/4 full.
- Bake for 10-12 minutes until golden brown and a toothpick comes out clean. Let cool in the pan for 5 minutes.
- Prepare the glaze by whisking together powdered sugar, milk, and vanilla extract until smooth.
- Dip the tops of each donut hole into the glaze and place them on a wire rack to let the glaze set.