Introduction to Creamy Coconut Crème Brûlée Recipe
What is Crème Brûlée?
Crème brûlée is a classic French dessert that delights many with its rich, creamy texture and a crispy caramelized sugar topping. Traditionally made with heavy cream, egg yolks, and sugar, this dessert is known for its smooth custard base. The name “crème brûlée” translates to “burnt cream,” referring to the method of caramelizing the sugar on top. When you crack the hard sugar crust, it reveals the velvety custard underneath, creating a delightful contrast in textures. This dessert is often served in individual ramekins, making it perfect for sharing or enjoying alone.
Why Choose a Coconut Variation?
Choosing a coconut variation of crème brûlée adds a tropical twist to this beloved dessert. Coconut milk provides a creamy base that is both dairy-free and rich in flavor. This makes it an excellent option for those who are lactose intolerant or following a vegan diet. The natural sweetness of coconut milk pairs beautifully with the caramelized sugar topping, creating a harmonious blend of flavors. Plus, the coconut variation is a fun way to introduce new tastes to your dessert repertoire. Whether you’re hosting a dinner party or simply treating yourself, this creamy coconut crème brûlée recipe is sure to impress!
Ingredients for Creamy Coconut Crème Brûlée Recipe
To create a delightful creamy coconut crème brûlée, you’ll need a few simple ingredients. Each component plays a vital role in achieving that perfect balance of flavors and textures. Here’s what you’ll need:
- 1 can (13.5 oz) full-fat coconut milk: This is the star of the show! It gives the dessert its creamy texture and rich coconut flavor.
- 1/2 cup granulated sugar: This sweetens the custard base, making it deliciously indulgent.
- 1/4 cup cornstarch: This helps thicken the mixture, ensuring a smooth and creamy consistency.
- 1/4 teaspoon salt: A pinch of salt enhances the flavors and balances the sweetness.
- 1 teaspoon vanilla extract: This adds a warm, aromatic flavor that complements the coconut beautifully.
- 1/4 cup dairy-free milk: Options like almond or oat milk work well here, adding extra creaminess without dairy.
- 1/4 cup brown sugar (for topping): This is used to create the signature caramelized crust on top of the crème brûlée.
Gathering these ingredients is the first step toward creating a delicious dessert that everyone will love. The combination of coconut milk and vanilla creates a tropical flavor that is both comforting and exciting. Now that you have your ingredients ready, let’s move on to the preparation!
Step-by-Step Preparation of Creamy Coconut Crème Brûlée Recipe
Step 1: Preheat the Oven
First things first, preheat your oven to 325°F. This step is crucial as it ensures that your crème brûlée cooks evenly. While the oven warms up, you can prepare your ramekins. Place six ramekins in a baking dish, leaving enough space between them. This setup will help create a water bath later, which is essential for a smooth custard.
Step 2: Prepare the Coconut Mixture
Next, grab a medium saucepan and combine the full-fat coconut milk, granulated sugar, cornstarch, and salt. Whisk these ingredients together over medium heat. Keep stirring until the mixture thickens and starts to bubble, which should take about 5-7 minutes. This step is important as it helps to activate the cornstarch, giving your dessert that creamy texture.
Step 3: Whisk the Egg Yolks and Sugar
While your coconut mixture is heating, take a separate bowl and whisk together the egg yolks and a bit of sugar. This step is vital for creating a rich custard. The sugar will help to lighten the yolks, making them easier to combine with the coconut mixture later. Whisk until the mixture is smooth and slightly pale.
Step 4: Combine Mixtures
Once your coconut mixture has thickened, remove it from the heat. Gradually pour the hot coconut mixture into the bowl with the egg yolks, whisking constantly. This technique, known as tempering, prevents the eggs from cooking too quickly. After everything is well combined, stir in the vanilla extract and dairy-free milk for added creaminess.
Step 5: Strain the Mixture
To ensure a silky-smooth texture, strain the combined mixture through a fine-mesh sieve into a clean bowl. This step removes any lumps and guarantees that your crème brûlée will be perfectly creamy. It’s a simple yet effective way to elevate your dessert!
Step 6: Pour into Ramekins
Now, it’s time to pour the strained mixture evenly into the prepared ramekins. Fill each ramekin to about three-quarters full. This allows enough space for the custard to expand slightly while baking. Be careful not to overfill, as this can lead to messy results.
Step 7: Bake in a Water Bath
To create a water bath, carefully pour hot water into the baking dish around the ramekins. The water should come halfway up the sides of the ramekins. This method helps to regulate the temperature, ensuring that your crème brûlée cooks gently and evenly. Bake in the preheated oven for 30-35 minutes. The edges should be set, but the center will still be slightly jiggly.
Step 8: Cool and Chill
Once baked, remove the ramekins from the water bath and let them cool to room temperature. After they have cooled, refrigerate the ramekins for at least 2 hours. Chilling is essential as it allows the custard to firm up and develop its flavors. Patience is key here!
Step 9: Caramelize the Sugar Topping
Before serving, sprinkle a thin layer of brown sugar on top of each chilled crème brûlée. Using a kitchen torch, caramelize the sugar until it forms a crispy crust. If you don’t have a torch, you can broil the ramekins in the oven for 1-2 minutes. Just keep a close eye on them to avoid burning. Allow the caramelized sugar to cool for a minute before serving. This final touch adds a delightful crunch to your creamy dessert!
Variations of Creamy Coconut Crème Brûlée Recipe
Adding Flavors: Vanilla and Lime
While the classic creamy coconut crème brûlée is delicious on its own, adding extra flavors can elevate it to new heights. One popular variation is to incorporate vanilla and lime. The warm notes of vanilla complement the coconut beautifully, while a splash of lime juice adds a refreshing zing. To achieve this, simply add the zest of one lime and a tablespoon of fresh lime juice to the coconut mixture during the cooking process. This combination creates a delightful balance of sweetness and tartness, making each bite a burst of flavor. Your guests will be amazed at how a little twist can transform this classic dessert!
Dairy-Free Options
If you’re looking for more dairy-free options, you’re in luck! The creamy coconut crème brûlée recipe is already a fantastic choice for those avoiding dairy. However, you can further enhance its dairy-free appeal by experimenting with different plant-based milks. For instance, try using cashew milk for a creamier texture or coconut cream for an even richer coconut flavor. You can also add a hint of almond extract for a nutty undertone. These variations not only keep the dessert dairy-free but also allow you to customize the flavor profile to suit your taste. Enjoy the freedom to create a dessert that fits your dietary needs while still being utterly delicious!
Cooking Note for Creamy Coconut Crème Brûlée Recipe
When preparing your creamy coconut crème brûlée, there are a few important cooking notes to keep in mind. These tips will help ensure that your dessert turns out perfectly every time.
First, always use full-fat coconut milk for the best results. This ingredient is crucial for achieving that rich and creamy texture that makes crème brûlée so delightful. Low-fat or light coconut milk may not provide the same level of creaminess, which can affect the overall taste and mouthfeel of your dessert.
Next, be mindful of the water bath. It’s essential to pour hot water into the baking dish carefully. This method helps to create a gentle cooking environment, preventing the custard from curdling. If the water is too cold, it may not cook the crème brûlée evenly, leading to an undesirable texture.
Additionally, keep an eye on the baking time. Ovens can vary, so it’s a good idea to check your crème brûlée a few minutes before the recommended time. The edges should be set, while the center remains slightly jiggly. Overbaking can lead to a rubbery texture, which is not what you want for this delicate dessert.
Lastly, patience is key when it comes to chilling. Allowing the crème brûlée to chill for at least two hours is essential for the flavors to meld and the custard to firm up. If you’re in a hurry, you might be tempted to skip this step, but trust us, the wait is worth it!
By following these cooking notes, you’ll be well on your way to creating a delicious creamy coconut crème brûlée that will impress your family and friends. Enjoy the process and savor the delightful results!
Serving Suggestions for Creamy Coconut Crème Brûlée Recipe
When it comes to serving your creamy coconut crème brûlée, presentation is key! This dessert is not only delicious but also visually appealing. Here are some delightful serving suggestions to enhance your dining experience:
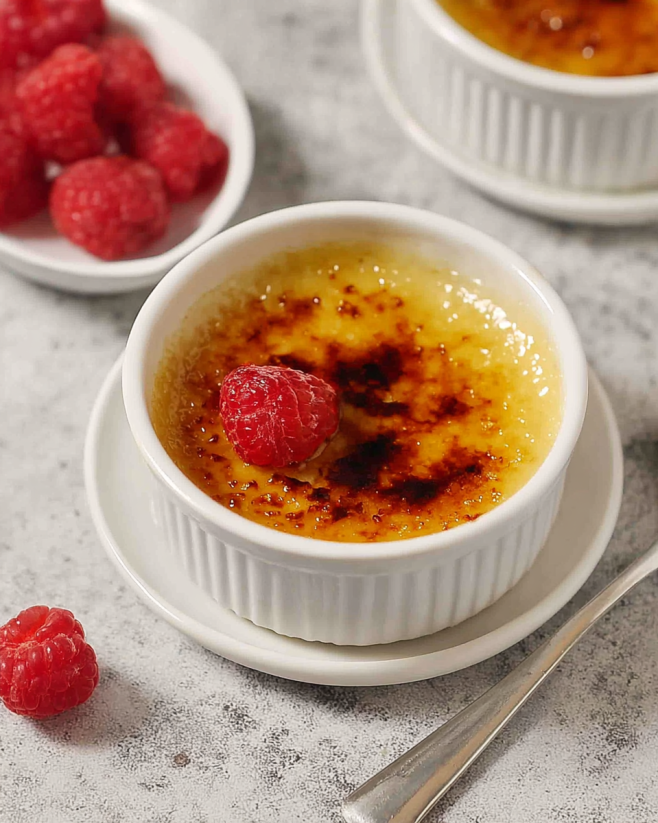
- Fresh Fruit Garnish: Top each ramekin with a few slices of fresh fruit. Berries like strawberries, raspberries, or blueberries add a pop of color and a refreshing contrast to the rich custard. You can also use tropical fruits like mango or kiwi for a fun twist.
- Mint Leaves: A sprig of fresh mint on top of each crème brûlée adds a touch of elegance. The bright green color complements the dessert beautifully and adds a hint of freshness.
- Chocolate Shavings: For chocolate lovers, consider adding some dark chocolate shavings on top. This not only enhances the flavor but also adds a sophisticated touch to your dessert.
- Serve with Coffee or Tea: Pair your crème brûlée with a cup of coffee or tea. The warm beverage balances the cool, creamy dessert, making for a delightful end to any meal.
- Miniature Ramekins: If you’re hosting a gathering, consider serving smaller portions in miniature ramekins. This allows guests to enjoy a taste without feeling too full, and it adds a fun element to your dessert table.
These serving suggestions will not only elevate the look of your creamy coconut crème brûlée but also enhance the overall flavor experience. Whether you’re celebrating a special occasion or simply indulging in a sweet treat, these ideas will make your dessert even more enjoyable. Remember, the key is to have fun and get creative with your presentation!
Tips for Perfecting Your Creamy Coconut Crème Brûlée Recipe
Creating the perfect creamy coconut crème brûlée is an art that can be mastered with a few helpful tips. Whether you’re a seasoned chef or a beginner in the kitchen, these suggestions will guide you toward a delightful dessert that impresses everyone.
First, always use fresh ingredients. Fresh coconut milk, eggs, and vanilla extract can significantly enhance the flavor of your crème brûlée. Opt for high-quality full-fat coconut milk for that rich, creamy texture. This choice is essential for achieving the luxurious mouthfeel that makes this dessert so special.
Next, pay attention to the temperature of your ingredients. Room temperature eggs blend more easily into the mixture, ensuring a smooth custard. If your eggs are cold, simply place them in warm water for a few minutes before using them. This small step can make a big difference in the final texture of your dessert.
When whisking the egg yolks and sugar, take your time. Whisk until the mixture is light and fluffy. This process incorporates air, which helps create a lighter custard. A well-aerated mixture will yield a more delicate texture, making each bite melt in your mouth.
Don’t skip the straining step! Straining the mixture through a fine-mesh sieve is crucial for removing any lumps or cooked egg bits. This ensures that your crème brûlée is silky smooth. It’s a simple step that can elevate your dessert from good to great.
Be mindful of the baking time and temperature. Every oven is different, so keep an eye on your crème brûlée as it bakes. The edges should be set, while the center remains slightly jiggly. If you overbake, you risk a rubbery texture, which is not ideal for this creamy dessert.
Lastly, allow your crème brûlée to chill properly. Chilling not only helps the custard firm up but also allows the flavors to meld beautifully. If you can, let it chill overnight for the best results. The longer it sits, the more delicious it becomes!
By following these tips, you’ll be well on your way to perfecting your creamy coconut crème brûlée recipe. Enjoy the process, and don’t forget to savor the delightful results!
Breakdown of Time for Creamy Coconut Crème Brûlée Recipe
Prep Time
The prep time for your creamy coconut crème brûlée is approximately 20-25 minutes. This includes gathering your ingredients, whisking the coconut mixture, and preparing the ramekins. Taking your time during this stage ensures that everything is well combined and ready for baking. Remember, a little patience goes a long way in creating a delicious dessert!
Cooking Time
Once you’ve prepped everything, the cooking time is about 30-35 minutes. During this time, the crème brûlée will bake in a water bath, allowing it to cook evenly. Keep an eye on it as it bakes, ensuring the edges are set while the center remains slightly jiggly. This careful cooking process is key to achieving that perfect creamy texture.
Total Time
In total, you can expect the entire process to take around 2.5 to 3 hours, including chilling time. After baking, it’s essential to let the crème brûlée cool to room temperature before refrigerating it for at least 2 hours. This chilling period allows the flavors to meld and the custard to firm up, resulting in a delightful dessert that’s ready to impress!
Nutritional Information for Creamy Coconut Crème Brûlée Recipe
Calories
When indulging in a creamy coconut crème brûlée, it’s essential to be aware of its caloric content. Each serving contains approximately 230 calories. This makes it a delightful treat that can fit into a balanced diet. While it’s a rich dessert, enjoying it in moderation allows you to savor its creamy goodness without overindulging.
Protein
In terms of protein, each serving of this creamy coconut crème brûlée offers about 2 grams. While this may not seem like a lot, it contributes to the overall nutritional profile of the dessert. The protein comes primarily from the egg yolks used in the recipe, which also help create that luscious custard texture. Pairing this dessert with a protein-rich meal can help balance your overall intake for the day.
Sodium
For those watching their sodium intake, this creamy coconut crème brûlée is a good choice. Each serving contains roughly 100 milligrams of sodium. This level is relatively low, making it suitable for most dietary needs. The small amount of salt used in the recipe enhances the flavors without adding excessive sodium, allowing you to enjoy this dessert guilt-free.
FAQs about Creamy Coconut Crème Brûlée Recipe
Can I make Creamy Coconut Crème Brûlée ahead of time?
Absolutely! One of the best things about creamy coconut crème brûlée is that it can be made ahead of time. In fact, preparing it a day in advance allows the flavors to meld beautifully. After baking and cooling, simply refrigerate the ramekins until you’re ready to serve. Just remember to caramelize the sugar topping right before serving for that perfect crispy crust. This way, you can enjoy a stress-free dessert experience at your next gathering!
What type of coconut milk should I use?
For the best results, always opt for full-fat coconut milk. This type provides the rich, creamy texture that makes crème brûlée so delightful. Low-fat or light coconut milk may not yield the same luxurious mouthfeel, which can affect the overall quality of your dessert. You can find full-fat coconut milk in cans at most grocery stores. Just be sure to shake the can well before using to mix the cream and liquid together!
How do I achieve the perfect caramelized top?
Achieving the perfect caramelized top is all about technique! After chilling your crème brûlée, sprinkle a thin, even layer of brown sugar on top. Using a kitchen torch is the best method for caramelizing the sugar, as it allows for precise control. Hold the torch a few inches above the sugar and move it in a circular motion until the sugar melts and turns golden brown. If you don’t have a torch, you can use the broiler in your oven. Just keep a close eye on it, as it can burn quickly. Allow the caramelized sugar to cool for a minute before serving, and enjoy that satisfying crack when you dig in!
Conclusion on Creamy Coconut Crème Brûlée Recipe
In conclusion, the creamy coconut crème brûlée recipe is a delightful twist on a classic dessert that brings a taste of the tropics to your table. With its rich coconut flavor and smooth custard base, this dessert is not only easy to make but also incredibly satisfying. Whether you’re celebrating a special occasion or simply indulging in a sweet treat, this recipe is sure to impress your family and friends.
By following the step-by-step preparation and incorporating the tips provided, you can create a dessert that is both visually stunning and delicious. The caramelized sugar topping adds a satisfying crunch, perfectly complementing the creamy custard beneath. Plus, with the option to customize flavors and make it dairy-free, this recipe caters to various dietary preferences, making it a versatile choice for any gathering.
So, gather your ingredients, preheat your oven, and embark on this culinary adventure. Enjoy the process of creating your creamy coconut crème brûlée, and don’t forget to savor each delightful bite. With its tropical flair and elegant presentation, this dessert is bound to become a favorite in your recipe collection. Happy baking!
Creamy Coconut Crème Brûlée
Ingredients
Equipment
Method
- Preheat your oven to 325°F. Place six ramekins in a baking dish.
- Combine the coconut milk, granulated sugar, cornstarch, and salt in a medium saucepan. Whisk over medium heat until thickened, about 5-7.
- In a separate bowl, whisk together the egg yolks and a bit of sugar until smooth and slightly pale.
- Gradually pour the hot coconut mixture into the egg yolks, whisking constantly. Stir in the vanilla extract and dairy-free milk.
- Strain the mixture through a fine-mesh sieve into a clean bowl.
- Pour the strained mixture evenly into the prepared ramekins, filling each to about three-quarters full.
- Pour hot water into the baking dish around the ramekins, halfway up the sides. Bake for 30-35.
- Let the ramekins cool to room temperature, then refrigerate for at least 120.
- Before serving, sprinkle brown sugar on top of each crème brûlée and caramelize using a kitchen torch or broil for 1-2.