Introduction to Red Velvet Cupcakes Recipe
The History of Red Velvet Cupcakes
Red velvet cupcakes have a rich and fascinating history. They first gained popularity in the early 20th century. The unique color and flavor of these cupcakes come from a combination of cocoa powder and buttermilk. Interestingly, the term “red velvet” was used to describe a cake with a soft, velvety texture. Many believe that the vibrant red color was originally achieved using beet juice. However, today, we often use red food coloring to achieve that signature hue.
During the 1920s, red velvet cake became a staple in Southern kitchens. It was often served at special occasions and celebrations. The cake’s popularity soared in the 1980s, thanks to a famous restaurant in New York City. They introduced the red velvet cake to a wider audience, and it quickly became a favorite across the nation. Now, red velvet cupcakes are a beloved treat, perfect for birthdays, weddings, or just a sweet indulgence.
Why You Should Try This Red Velvet Cupcakes Recipe
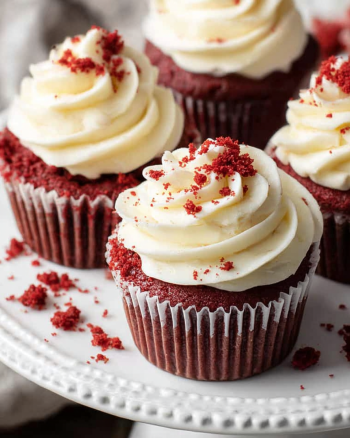
If you’re looking for a delightful dessert, this red velvet cupcakes recipe is a must-try! Not only are they visually stunning, but they also offer a unique flavor that combines chocolate and vanilla. The moist texture and rich cream cheese frosting make them irresistible.
This recipe is easy to follow, even for beginners. With simple ingredients and straightforward steps, you can whip up a batch in no time. Plus, these cupcakes are gluten-free, making them suitable for those with dietary restrictions. Whether you’re hosting a party or just treating yourself, these red velvet cupcakes will surely impress your guests and satisfy your sweet tooth!
Ingredients for Red Velvet Cupcakes Recipe
To create the perfect red velvet cupcakes, you’ll need a selection of simple yet essential ingredients. Each component plays a vital role in achieving that classic flavor and texture. Here’s what you’ll need:
- 1 ½ cups gluten-free all-purpose flour
- 1 cup granulated sugar
- 1 teaspoon baking soda
- 1 teaspoon baking powder
- ½ teaspoon salt
- 1 teaspoon cocoa powder
- 1 cup vegetable oil
- 1 cup buttermilk, at room temperature
- 2 large eggs
- 2 tablespoons red food coloring
- 1 teaspoon vanilla extract
- 1 teaspoon white vinegar
For the cream cheese frosting, gather the following ingredients:
- 8 ounces cream cheese, softened
- ½ cup unsalted butter, softened
- 4 cups powdered sugar
- 1 teaspoon vanilla extract
- 1-2 tablespoons milk (as needed for consistency)
These ingredients come together to create a delightful treat that is both visually appealing and delicious. The gluten-free flour ensures that everyone can enjoy these cupcakes, while the rich cream cheese frosting adds a perfect finishing touch. Now that you have your ingredients ready, let’s move on to the preparation!
Step-by-Step Preparation of Red Velvet Cupcakes Recipe
Step 1: Preheat the Oven
First things first, preheating your oven is essential. Set it to 350°F (175°C). This ensures that your cupcakes bake evenly. While the oven heats up, you can prepare your muffin tin. Line it with cupcake liners to make removing the cupcakes easier later on. This step is crucial for a hassle-free baking experience!
Step 2: Prepare the Cupcake Batter
Now, let’s get to the fun part—making the batter! In a large mixing bowl, whisk together the gluten-free flour, granulated sugar, baking soda, baking powder, salt, and cocoa powder. Make sure everything is well combined. This dry mixture is the foundation of your cupcakes.
In another bowl, mix the vegetable oil, buttermilk, eggs, red food coloring, vanilla extract, and white vinegar. Stir until the mixture is smooth and uniform. Gradually add this wet mixture to the dry ingredients. Mix gently until just combined. Remember, overmixing can lead to dense cupcakes, so be careful!
Step 3: Bake the Cupcakes
Once your batter is ready, it’s time to fill the cupcake liners. Divide the batter evenly among the liners, filling each about two-thirds full. This allows room for the cupcakes to rise without overflowing. Now, place the muffin tin in the preheated oven and bake for 18-20 minutes. To check if they’re done, insert a toothpick into the center of a cupcake. If it comes out clean, they’re ready!
Step 4: Cool the Cupcakes
After baking, let the cupcakes cool in the pan for about 5 minutes. This helps them set and makes them easier to remove. Then, carefully transfer them to a wire rack to cool completely. Cooling is important because frosting warm cupcakes can cause the frosting to melt. Patience is key here!
Step 5: Prepare the Frosting
While the cupcakes cool, you can prepare the delicious cream cheese frosting. In a mixing bowl, beat the softened cream cheese and unsalted butter together until creamy. Gradually add the powdered sugar and vanilla extract, mixing until smooth. If the frosting is too thick, add milk one tablespoon at a time until you reach your desired consistency. This frosting is rich and adds a perfect touch to your cupcakes!
Step 6: Frost the Cupcakes
Once the cupcakes are completely cool, it’s time to frost them! Use a spatula or a piping bag to spread the cream cheese frosting on top of each cupcake. Be creative with your frosting technique! You can swirl it on for a classic look or pipe it into fun shapes. Enjoy the process, and don’t forget to taste a little frosting along the way!
Variations of Red Velvet Cupcakes Recipe
Gluten-Free Red Velvet Cupcakes Recipe
If you’re looking for a gluten-free option, you’re in luck! The red velvet cupcakes recipe provided is already gluten-free, thanks to the use of gluten-free all-purpose flour. This means everyone can enjoy these delicious treats without worry. Just make sure to check that all your ingredients, especially the baking powder and food coloring, are gluten-free. This way, you can indulge in the rich flavor and vibrant color without any gluten-related concerns.
For an extra twist, consider adding gluten-free chocolate chips to the batter. This will enhance the chocolate flavor and add a delightful surprise in every bite. You can also top your gluten-free cupcakes with crushed nuts or sprinkles for added texture and visual appeal. These small adjustments can make your gluten-free red velvet cupcakes even more enjoyable!
Vegan Red Velvet Cupcakes Recipe
For those following a vegan diet, you can easily adapt this red velvet cupcakes recipe to suit your needs. Start by replacing the eggs with flaxseed meal or applesauce. To make a flax egg, mix one tablespoon of flaxseed meal with three tablespoons of water. Let it sit for about 5 minutes until it thickens. This will act as a binding agent in your batter.
Next, substitute the buttermilk with a plant-based alternative. Almond milk or soy milk mixed with a teaspoon of vinegar can work perfectly. For the frosting, use vegan cream cheese and dairy-free butter. This way, you can still enjoy the creamy, rich frosting that pairs so well with red velvet cupcakes.
These vegan red velvet cupcakes will be just as moist and flavorful as the original recipe. Plus, they’ll be a hit at any gathering, ensuring that everyone can enjoy a sweet treat!
Cooking Note for Red Velvet Cupcakes Recipe
When it comes to baking red velvet cupcakes, a few cooking notes can help you achieve the best results. First, always measure your ingredients accurately. Using a kitchen scale can ensure precision, especially with flour. Too much flour can lead to dry cupcakes, while too little can make them too dense.
Next, make sure your ingredients are at room temperature. This includes the buttermilk, eggs, and butter. Room temperature ingredients mix more easily, resulting in a smoother batter. It also helps the cupcakes rise evenly, giving them that perfect fluffy texture.
Another important tip is to avoid overmixing the batter. Once you combine the wet and dry ingredients, mix just until you see no dry flour. Overmixing can develop gluten, which may lead to tough cupcakes. Remember, a few lumps are okay!
When baking, keep an eye on the time. Ovens can vary, so check your cupcakes a minute or two before the suggested baking time. If you notice they are browning too quickly, you can cover them loosely with aluminum foil to prevent burning.
Lastly, let your cupcakes cool completely before frosting. This step is crucial because warm cupcakes can cause the frosting to melt and slide off. If you’re in a hurry, you can place them in the fridge for a few minutes to speed up the cooling process.
By following these cooking notes, you’ll be well on your way to creating delicious red velvet cupcakes that are sure to impress!
Serving Suggestions for Red Velvet Cupcakes Recipe
When it comes to serving your delightful red velvet cupcakes, presentation and pairing can elevate the experience. Here are some creative serving suggestions to make your cupcakes even more enjoyable:
- Garnish with Fresh Berries: Top each cupcake with fresh raspberries or strawberries. The tartness of the berries complements the sweetness of the cream cheese frosting beautifully.
- Serve with a Scoop of Ice Cream: For an indulgent treat, serve your cupcakes with a scoop of vanilla or chocolate ice cream. The cold ice cream pairs perfectly with the warm, moist cupcakes.
- Pair with Coffee or Tea: Red velvet cupcakes go wonderfully with a cup of coffee or tea. The rich flavors of the cupcakes enhance the experience of sipping your favorite beverage.
- Decorate with Edible Glitter: For a festive touch, sprinkle some edible glitter on top of the frosting. This adds a fun sparkle, making them perfect for celebrations.
- Use Decorative Plates: Present your cupcakes on decorative plates or tiered stands. This not only makes them look appealing but also adds a touch of elegance to your dessert table.
- Offer a Variety of Frostings: If you’re feeling adventurous, consider offering different frosting options. Alongside cream cheese frosting, you could provide chocolate ganache or vanilla buttercream for guests to choose from.
These serving suggestions can enhance the overall experience of enjoying your red velvet cupcakes. Whether it’s a birthday party, a holiday gathering, or just a cozy night in, these ideas will surely impress your guests and make your cupcakes the star of the show!
Tips for Perfecting Your Red Velvet Cupcakes Recipe
Creating the perfect red velvet cupcakes is an art that combines technique and a little bit of love. Here are some valuable tips to help you achieve cupcake perfection every time:
- Use Quality Ingredients: The quality of your ingredients can significantly impact the final product. Opt for fresh eggs, high-quality cocoa powder, and pure vanilla extract. These small choices can elevate the flavor of your cupcakes.
- Don’t Skip the Vinegar: The addition of white vinegar is crucial. It reacts with the baking soda to create a light and fluffy texture. This reaction is what gives red velvet cupcakes their signature rise and softness.
- Check Your Oven Temperature: Ovens can vary in temperature. Use an oven thermometer to ensure your oven is at the correct temperature. Baking at the right temperature is key to achieving the perfect texture.
- Let the Batter Rest: After mixing your batter, let it sit for about 10 minutes before baking. This allows the gluten to relax, resulting in a more tender cupcake.
- Use a Cookie Scoop: For even-sized cupcakes, use a cookie scoop to portion the batter. This ensures that all your cupcakes bake evenly and look uniform.
- Experiment with Flavor: While the classic red velvet flavor is delightful, don’t hesitate to experiment! Add a hint of almond extract or a splash of orange zest for a unique twist.
- Cool Completely Before Frosting: As mentioned earlier, cooling your cupcakes completely is essential. This prevents the frosting from melting and sliding off, ensuring a beautiful presentation.
- Practice Your Frosting Technique: If you want to impress, practice your frosting skills! Use a piping bag with different tips to create beautiful designs. Swirls, rosettes, or simple dollops can make your cupcakes look professional.
- Store Properly: To keep your cupcakes fresh, store them in an airtight container at room temperature. If you need to keep them longer, consider refrigerating them. Just remember to bring them back to room temperature before serving.
By following these tips, you’ll be well on your way to mastering the art of red velvet cupcakes. Each batch will be a delightful treat that you can proudly share with family and friends!
Breakdown of Time for Red Velvet Cupcakes Recipe
Prep Time
Preparing your red velvet cupcakes is a breeze! The prep time for this recipe is approximately 20-25 minutes. This includes gathering your ingredients, measuring them out, and mixing the batter. Make sure to have everything ready before you start. It makes the process smoother and more enjoyable!
Cooking Time
Once your batter is ready, it’s time to bake! The cooking time for the red velvet cupcakes is about 18-20 minutes. Keep an eye on them as they bake. Ovens can vary, so checking a minute or two early is a good idea. You want them to be perfectly baked, not overdone!
Total Time
In total, you can expect to spend around 40-45 minutes from start to finish. This includes both prep and cooking time. Once the cupcakes are baked, don’t forget to allow them to cool completely before frosting. This cooling period usually takes about 30 minutes. So, in just under an hour, you’ll have a delicious batch of red velvet cupcakes ready to impress!
Nutritional Information for Red Velvet Cupcakes Recipe
Calories
When indulging in a red velvet cupcake, it’s essential to be aware of the calories. Each cupcake contains approximately 290 calories. This makes them a delightful treat, but moderation is key. Enjoying one or two cupcakes as part of a balanced diet can satisfy your sweet cravings without overdoing it.
Protein
In terms of protein, each red velvet cupcake offers about 3 grams. While this isn’t a high protein snack, it does contribute to your daily intake. Pairing your cupcake with a protein-rich beverage, like a glass of milk, can enhance the overall nutritional value of your dessert experience.
Sodium
Each cupcake contains around 200 milligrams of sodium. This amount is relatively moderate, especially when considering the overall flavor profile of the cupcakes. If you’re watching your sodium intake, it’s a good idea to enjoy these cupcakes occasionally and balance them with lower-sodium meals throughout the day.
Understanding the nutritional information of your red velvet cupcakes can help you make informed choices. While they are a delicious treat, being mindful of portion sizes and overall dietary balance is essential. Enjoy your baking and savor every bite of these delightful cupcakes!
FAQs about Red Velvet Cupcakes Recipe
What makes red velvet cupcakes red?
The vibrant red color of red velvet cupcakes primarily comes from red food coloring. This ingredient enhances the natural reddish hue that cocoa powder can provide. In the past, some bakers used beet juice to achieve a similar effect. However, today, food coloring is the most common method. It’s important to use a good quality food coloring to ensure that your cupcakes have that signature bright red appearance.
Can I use cocoa powder instead of red food coloring in the Red Velvet Cupcakes Recipe?
While cocoa powder is a key ingredient in red velvet cupcakes, it does not provide the red color. If you omit the red food coloring, your cupcakes will have a chocolate flavor but will appear more brown than red. If you prefer a natural alternative, you could experiment with beet juice, but it may alter the flavor slightly. For the classic red velvet look, it’s best to stick with the food coloring.
How do I store leftover red velvet cupcakes?
To keep your leftover red velvet cupcakes fresh, store them in an airtight container at room temperature. This will help maintain their moisture and flavor. If you live in a particularly warm or humid area, you might want to refrigerate them. Just remember to bring them back to room temperature before serving, as this enhances the taste and texture. If you have frosted cupcakes, be sure to place a piece of wax paper between the cupcakes to prevent the frosting from sticking.
Can I make the Red Velvet Cupcakes Recipe ahead of time?
Absolutely! You can prepare the red velvet cupcakes ahead of time. Once baked and cooled, store them in an airtight container for up to three days. If you want to make them even earlier, consider freezing the unfrosted cupcakes. Wrap them tightly in plastic wrap and place them in a freezer-safe container. They can be frozen for up to three months. When you’re ready to enjoy them, simply thaw at room temperature and frost as desired!
Conclusion on Red Velvet Cupcakes Recipe
In conclusion, the red velvet cupcakes recipe is a delightful treat that combines rich flavors and a stunning appearance. Whether you’re baking for a special occasion or simply indulging in a sweet craving, these cupcakes are sure to impress. With their moist texture and creamy frosting, they offer a perfect balance of taste and visual appeal.
By following the steps outlined in this article, you can create a batch of red velvet cupcakes that will leave everyone wanting more. Remember, the key to success lies in using quality ingredients, measuring accurately, and allowing your cupcakes to cool completely before frosting. These small details can make a big difference in the final result.
Don’t hesitate to experiment with variations, such as gluten-free or vegan options, to cater to different dietary needs. The versatility of this recipe allows you to customize it to your liking, ensuring that everyone can enjoy a delicious cupcake.
So, gather your ingredients, preheat your oven, and get ready to bake! With a little love and care, you’ll create red velvet cupcakes that are not only a feast for the eyes but also a treat for the taste buds. Happy baking!
Red Velvet Cupcakes
Ingredients
Equipment
Method
- Preheat the oven to 350°F (175°C) and line a muffin tin with cupcake liners.
- In a large mixing bowl, whisk together the dry ingredients: gluten-free flour, sugar, baking soda, baking powder, salt, and cocoa powder.
- In another bowl, mix the wet ingredients: vegetable oil, buttermilk, eggs, red food coloring, vanilla extract, and white vinegar until smooth.
- Gradually add the wet mixture to the dry ingredients and mix gently until just combined.
- Divide the batter evenly among the cupcake liners, filling each about two-thirds full. Bake for 18-20 minutes.
- Let the cupcakes cool in the pan for 5 minutes, then transfer to a wire rack to cool completely.
- Prepare the frosting by beating cream cheese and butter until creamy, then gradually add powdered sugar and vanilla extract until smooth.
- Frost the cooled cupcakes with the cream cheese frosting using a spatula or piping bag.